How to add MailPoet to Elementor
Note: First install the latest version of MailPoet 3. Elementor supports all versions of MailPoet.
- Drag a Form widget into the Elementor editing screen.
- Click the pencil on the top upper right of the widget window to open the panel. Then, in the panel, under Content go down to Actions After Submit.

- You will see ‘email’ already inside the box. Add ‘MailPoet’, press the green ‘Save’ button in the panel. Now that you have added MailPoet, it will appear under Content. Close Actions after Submit by clicking on it again.

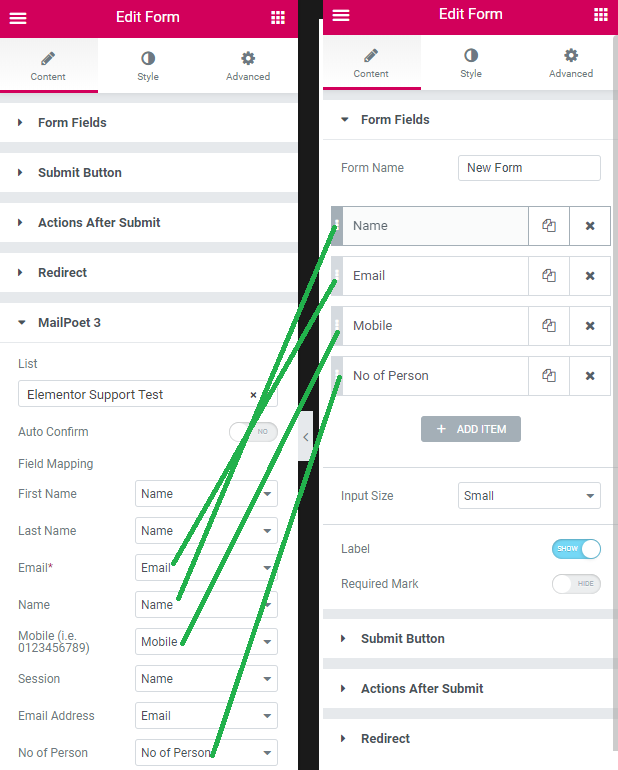
- Now Go to Form Fields and change the wording of the fields to ‘First Name’,
- Add another field called ‘Last Name’. Under type be sure to choose ‘text’ for the last name field.

- Still in Content > MailPoet3, in the drop-down menu choose LIST. Here you can add a pre-existing list – e.g. ‘subscribers’.
- Now, go back down to MailPoet3, under Field Mapping, and add name and email.
- Click the middle arrow in the editing screen to view your page live and test sending an email.


That’s it.
Now you can send a newsletter or other communications to specific lists such as subscribers etc. Email marketing is a great way to send everyone email updates to promote your business. Try it out!
MailPoet “Server error. Form not sent. This Message is not visible for site visitors.” when submitting a form linked to a MailPoet account.
It happens if any custom field added in MailPoet has not been mapped in Elementor Form widget (via the MailPoet3 tab). If a single field is not mapped, it will throw this validation error.
In this case, the form redirect of the form won’t work as well, naturally.
Once all form fields are mapped correctly to all MailPoet fields everything should work fine.
Example of field mapping properly done: